Adding HomeKit via Meross MSG100 to a Chamberlain Security+ 3.0 Garage Door
Recently my garage door motor failed and was replaced with a Security+ 3.0 Chamberlain garage door motor. Unfortunately, this caused my Meross MSG100 to stop working with the wires that used to work with a classic button for controlling the garage door.
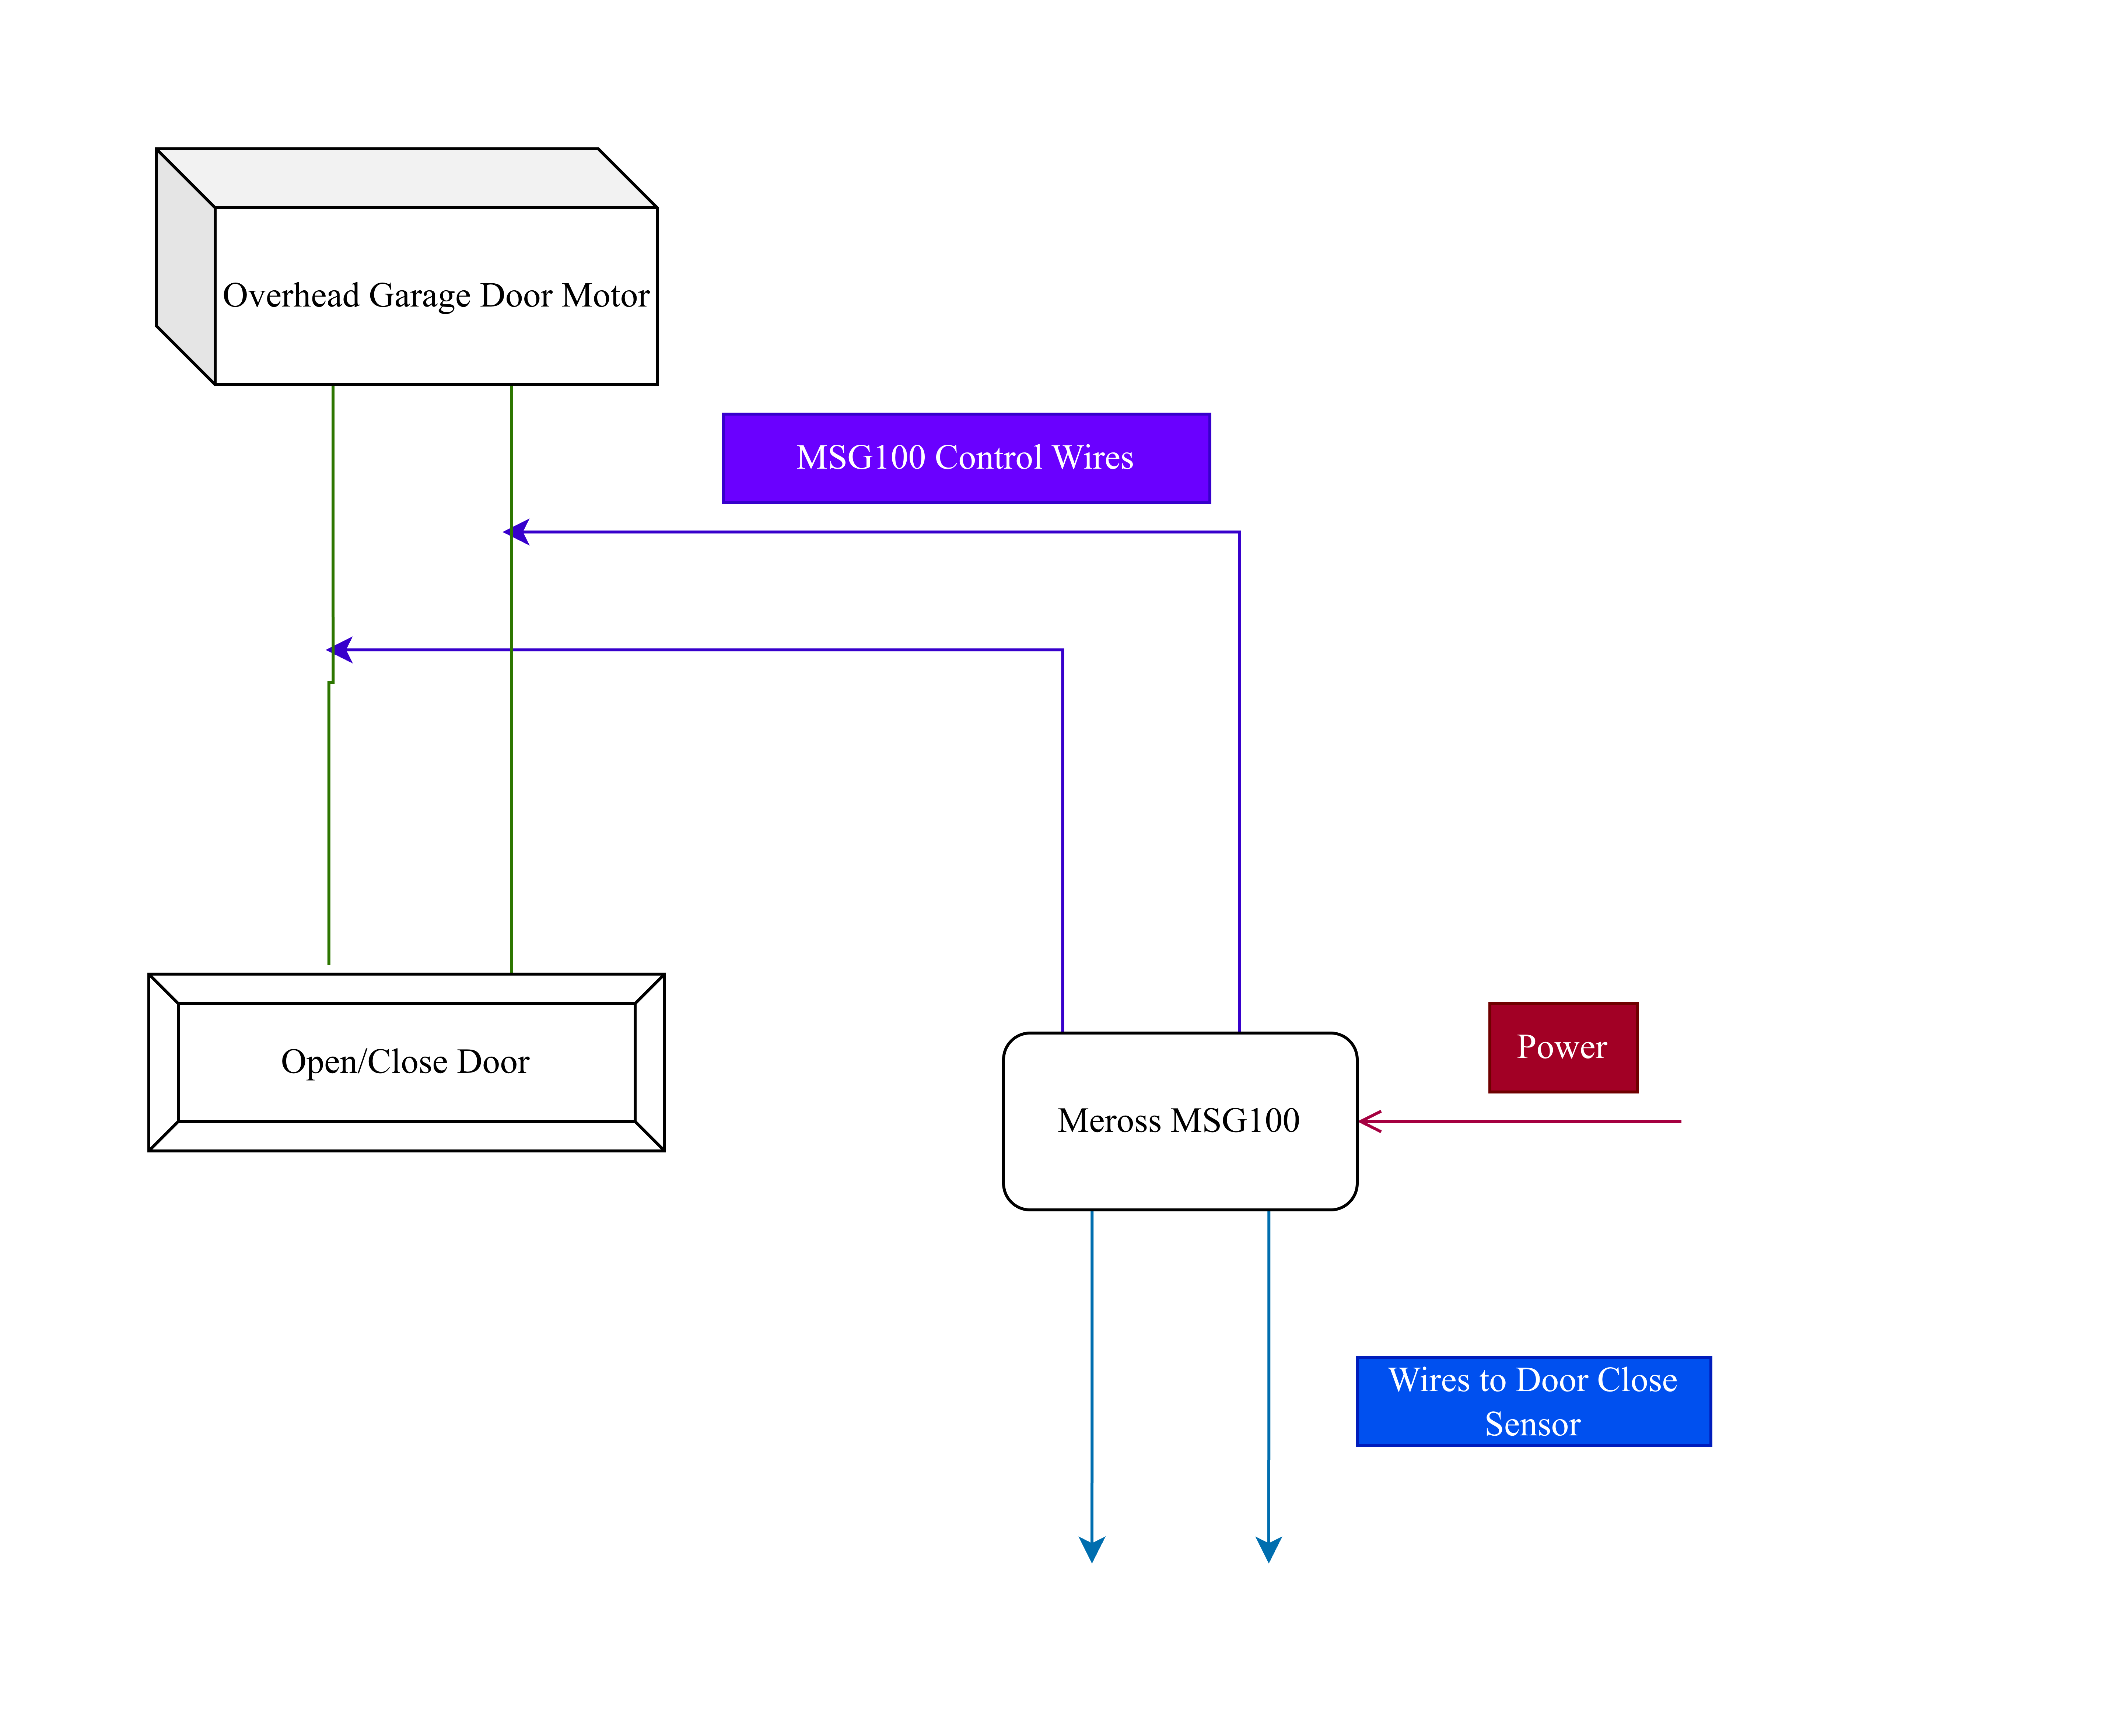
Here is a diagram showing the previous wiring with an explanation of the change:
The Problem with Security+ 3.0
I haven't read many good things about the MyQ app or Security+ 3.0 in general. The Verge's article on it sums up the problems well. I'd rather just use Homekit locally, saves me from installing another smart home app and giving MyQ access to my garage door opening/closing habits.
Finding a Solution
After realizing I couldn't just attach the button wires like I used to, I did some research and found dry contact adapters on eBay. I didn't want to pay $30 for a garage door button, especially when I already had a good one. Plus, the Security+ 3.0 ones appear to be more rare and much more expensive. But from looking at the eBay thumbnails and reading some Reddit posts about them, I realized the wires were probably just soldered to a momentary button on the circuit board.
The DIY Approach
I took the button off the wall and brought it inside to inspect. Turns out it is just a momentary button.
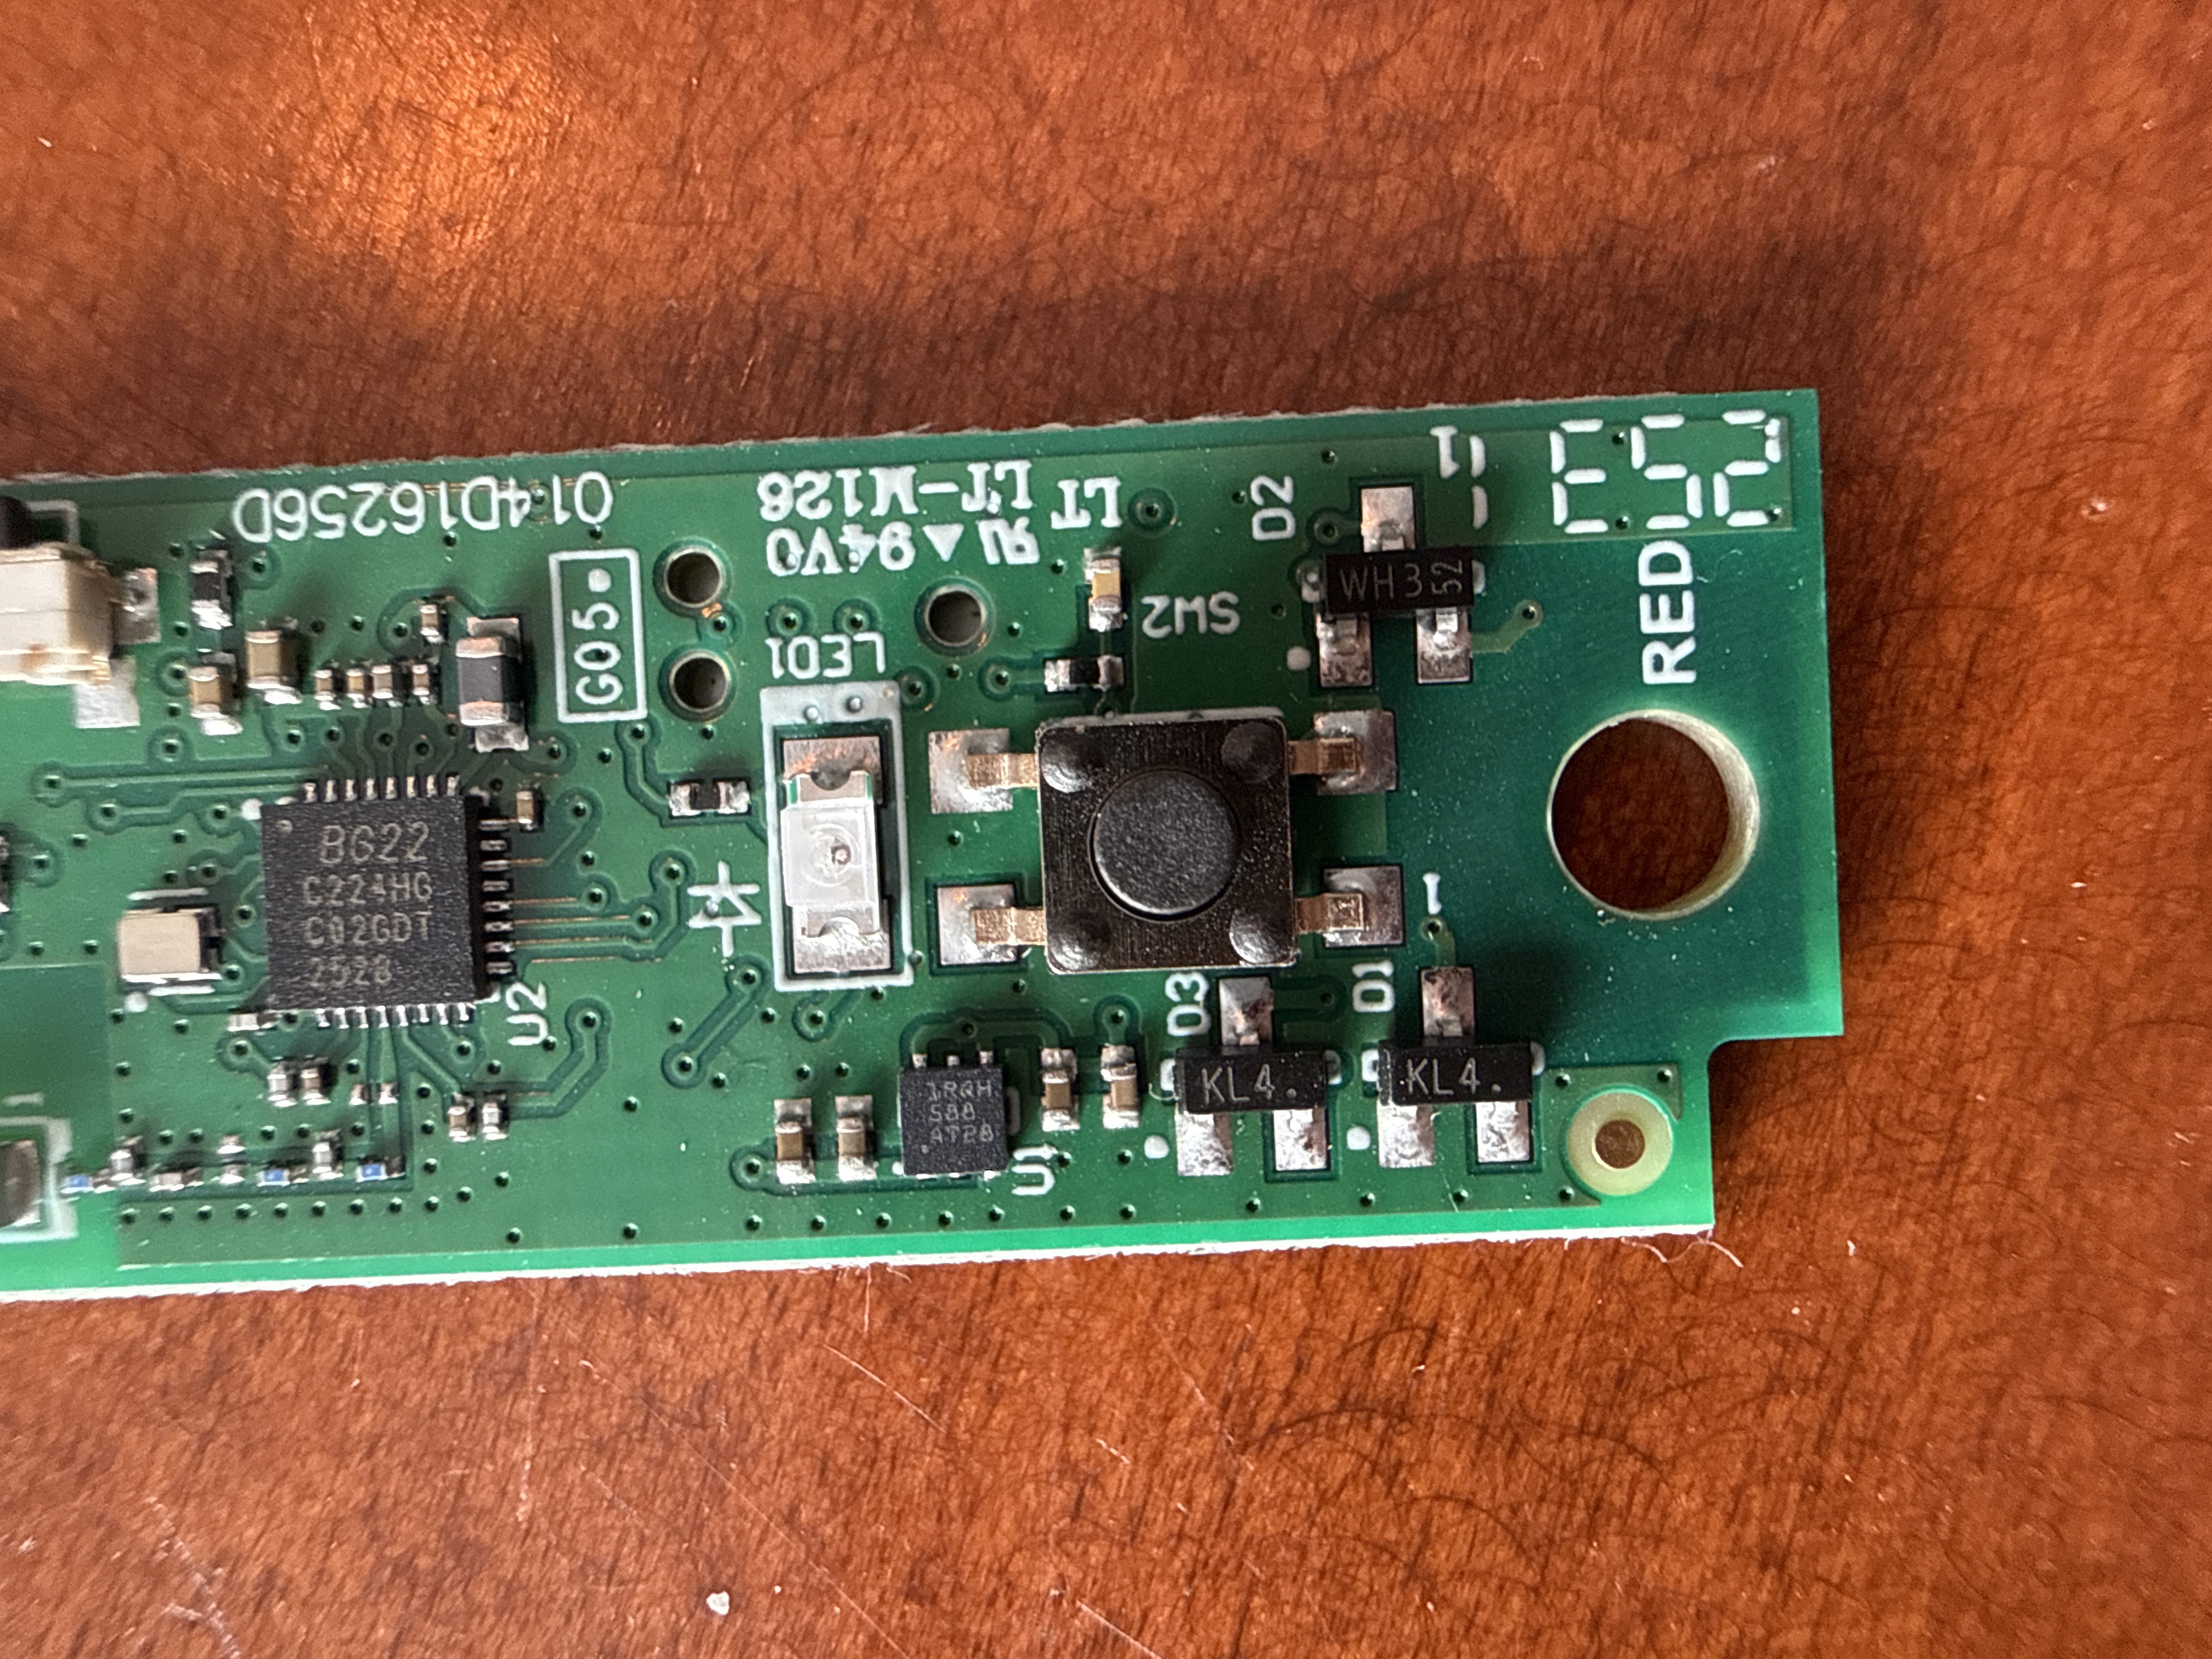
I have a nice soldering set featuring the PINECIL (thx CLANDIS 😄), so I figured I could just solder some wires to the button and use that. The Meross MSG100 just acts as a HomeKit-controlled momentary switch so wiring that up should work fine.
Testing the Theory
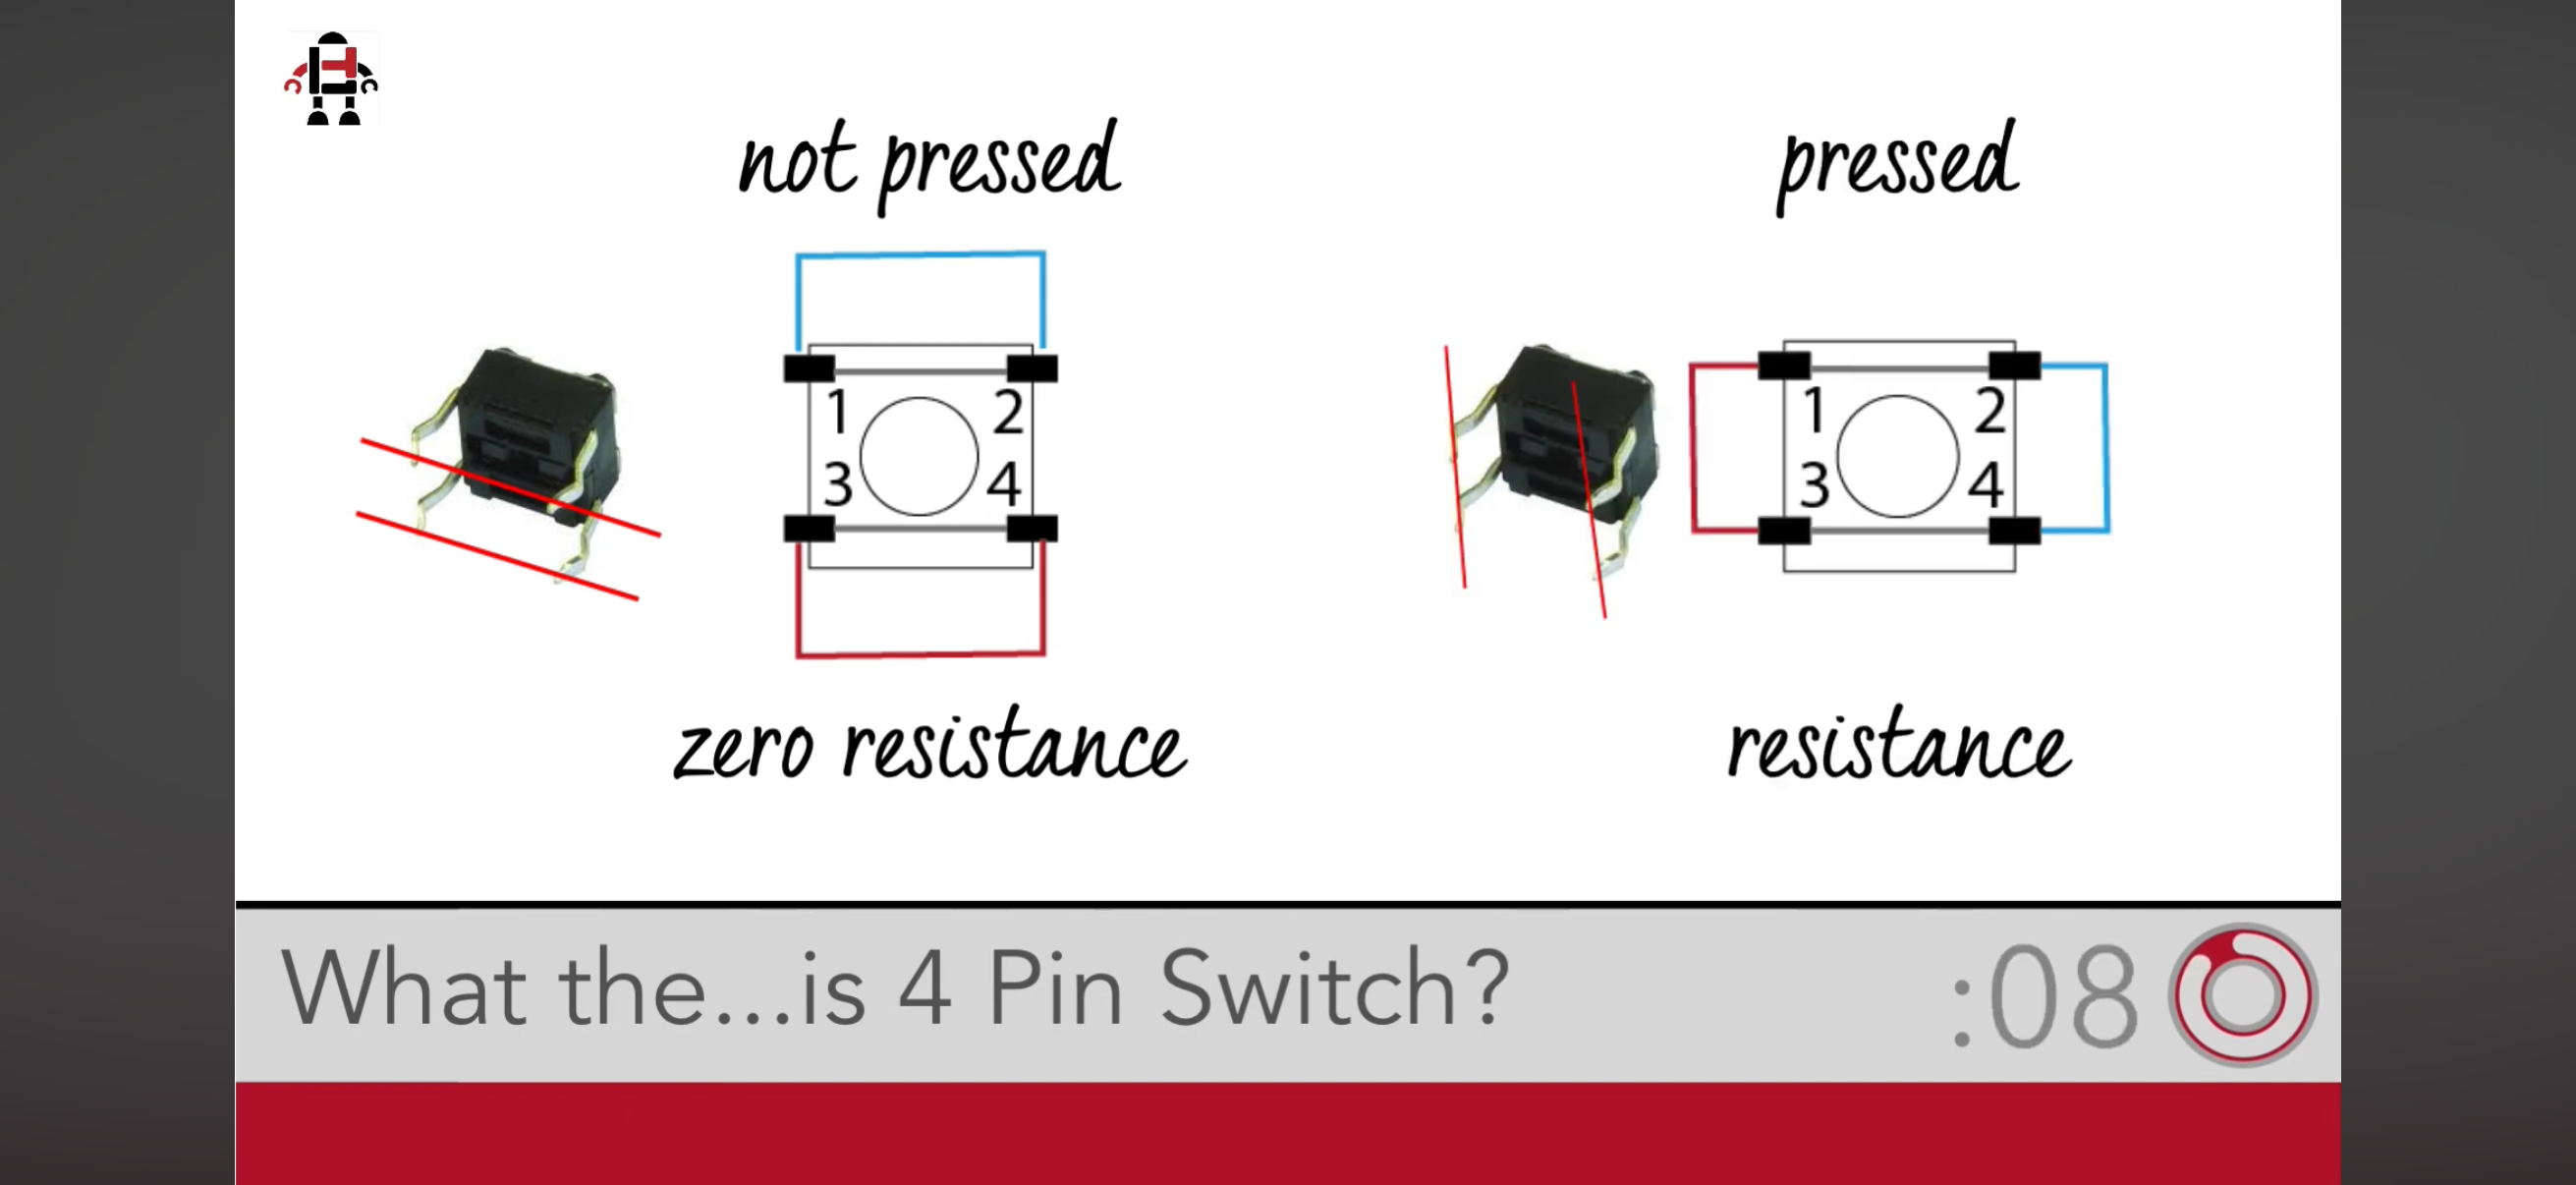
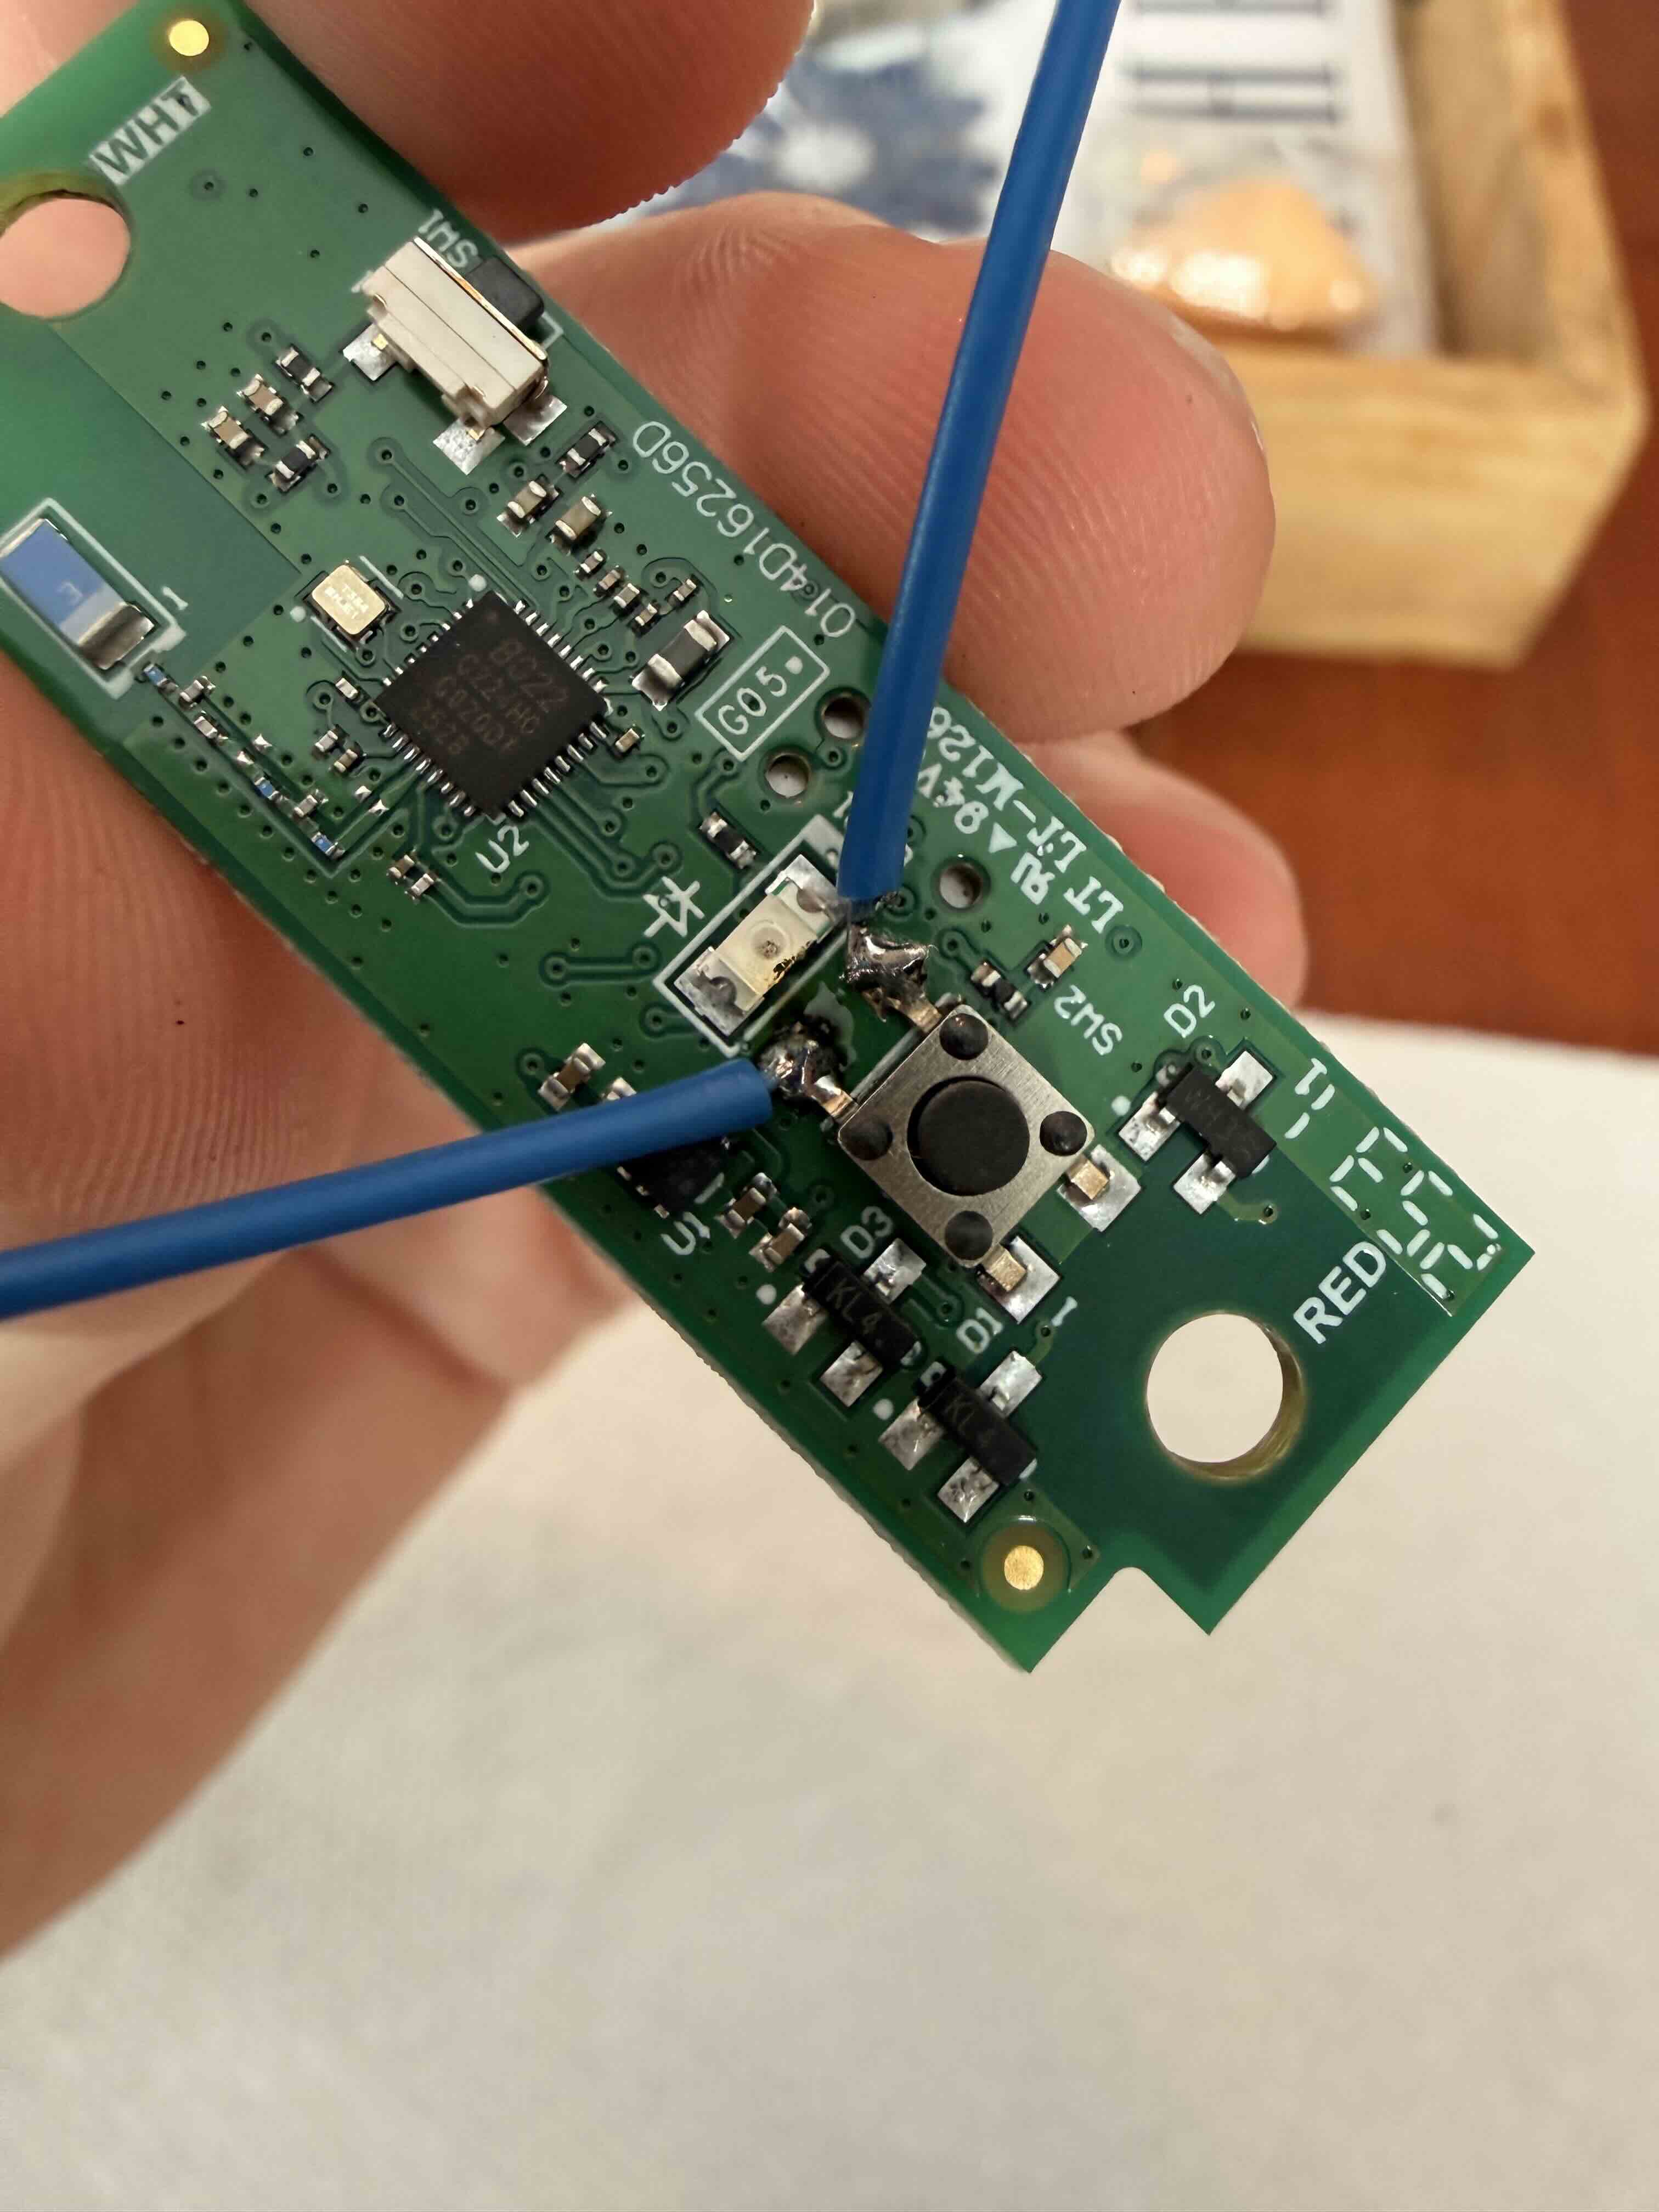
I consulted a bit with Claude to figure out which pins were most likely in use, and it recommended I use a multimeter to test. I couldn't find mine, so I rewired the circuit board to the garage door wires and left the plastic casing off exposing the button pins. After consulting the diagram below, I manually connected both the bottom pins with a wire, no luck, then connected both the top pins with a wire and the door opened :)
Putting It Back Together
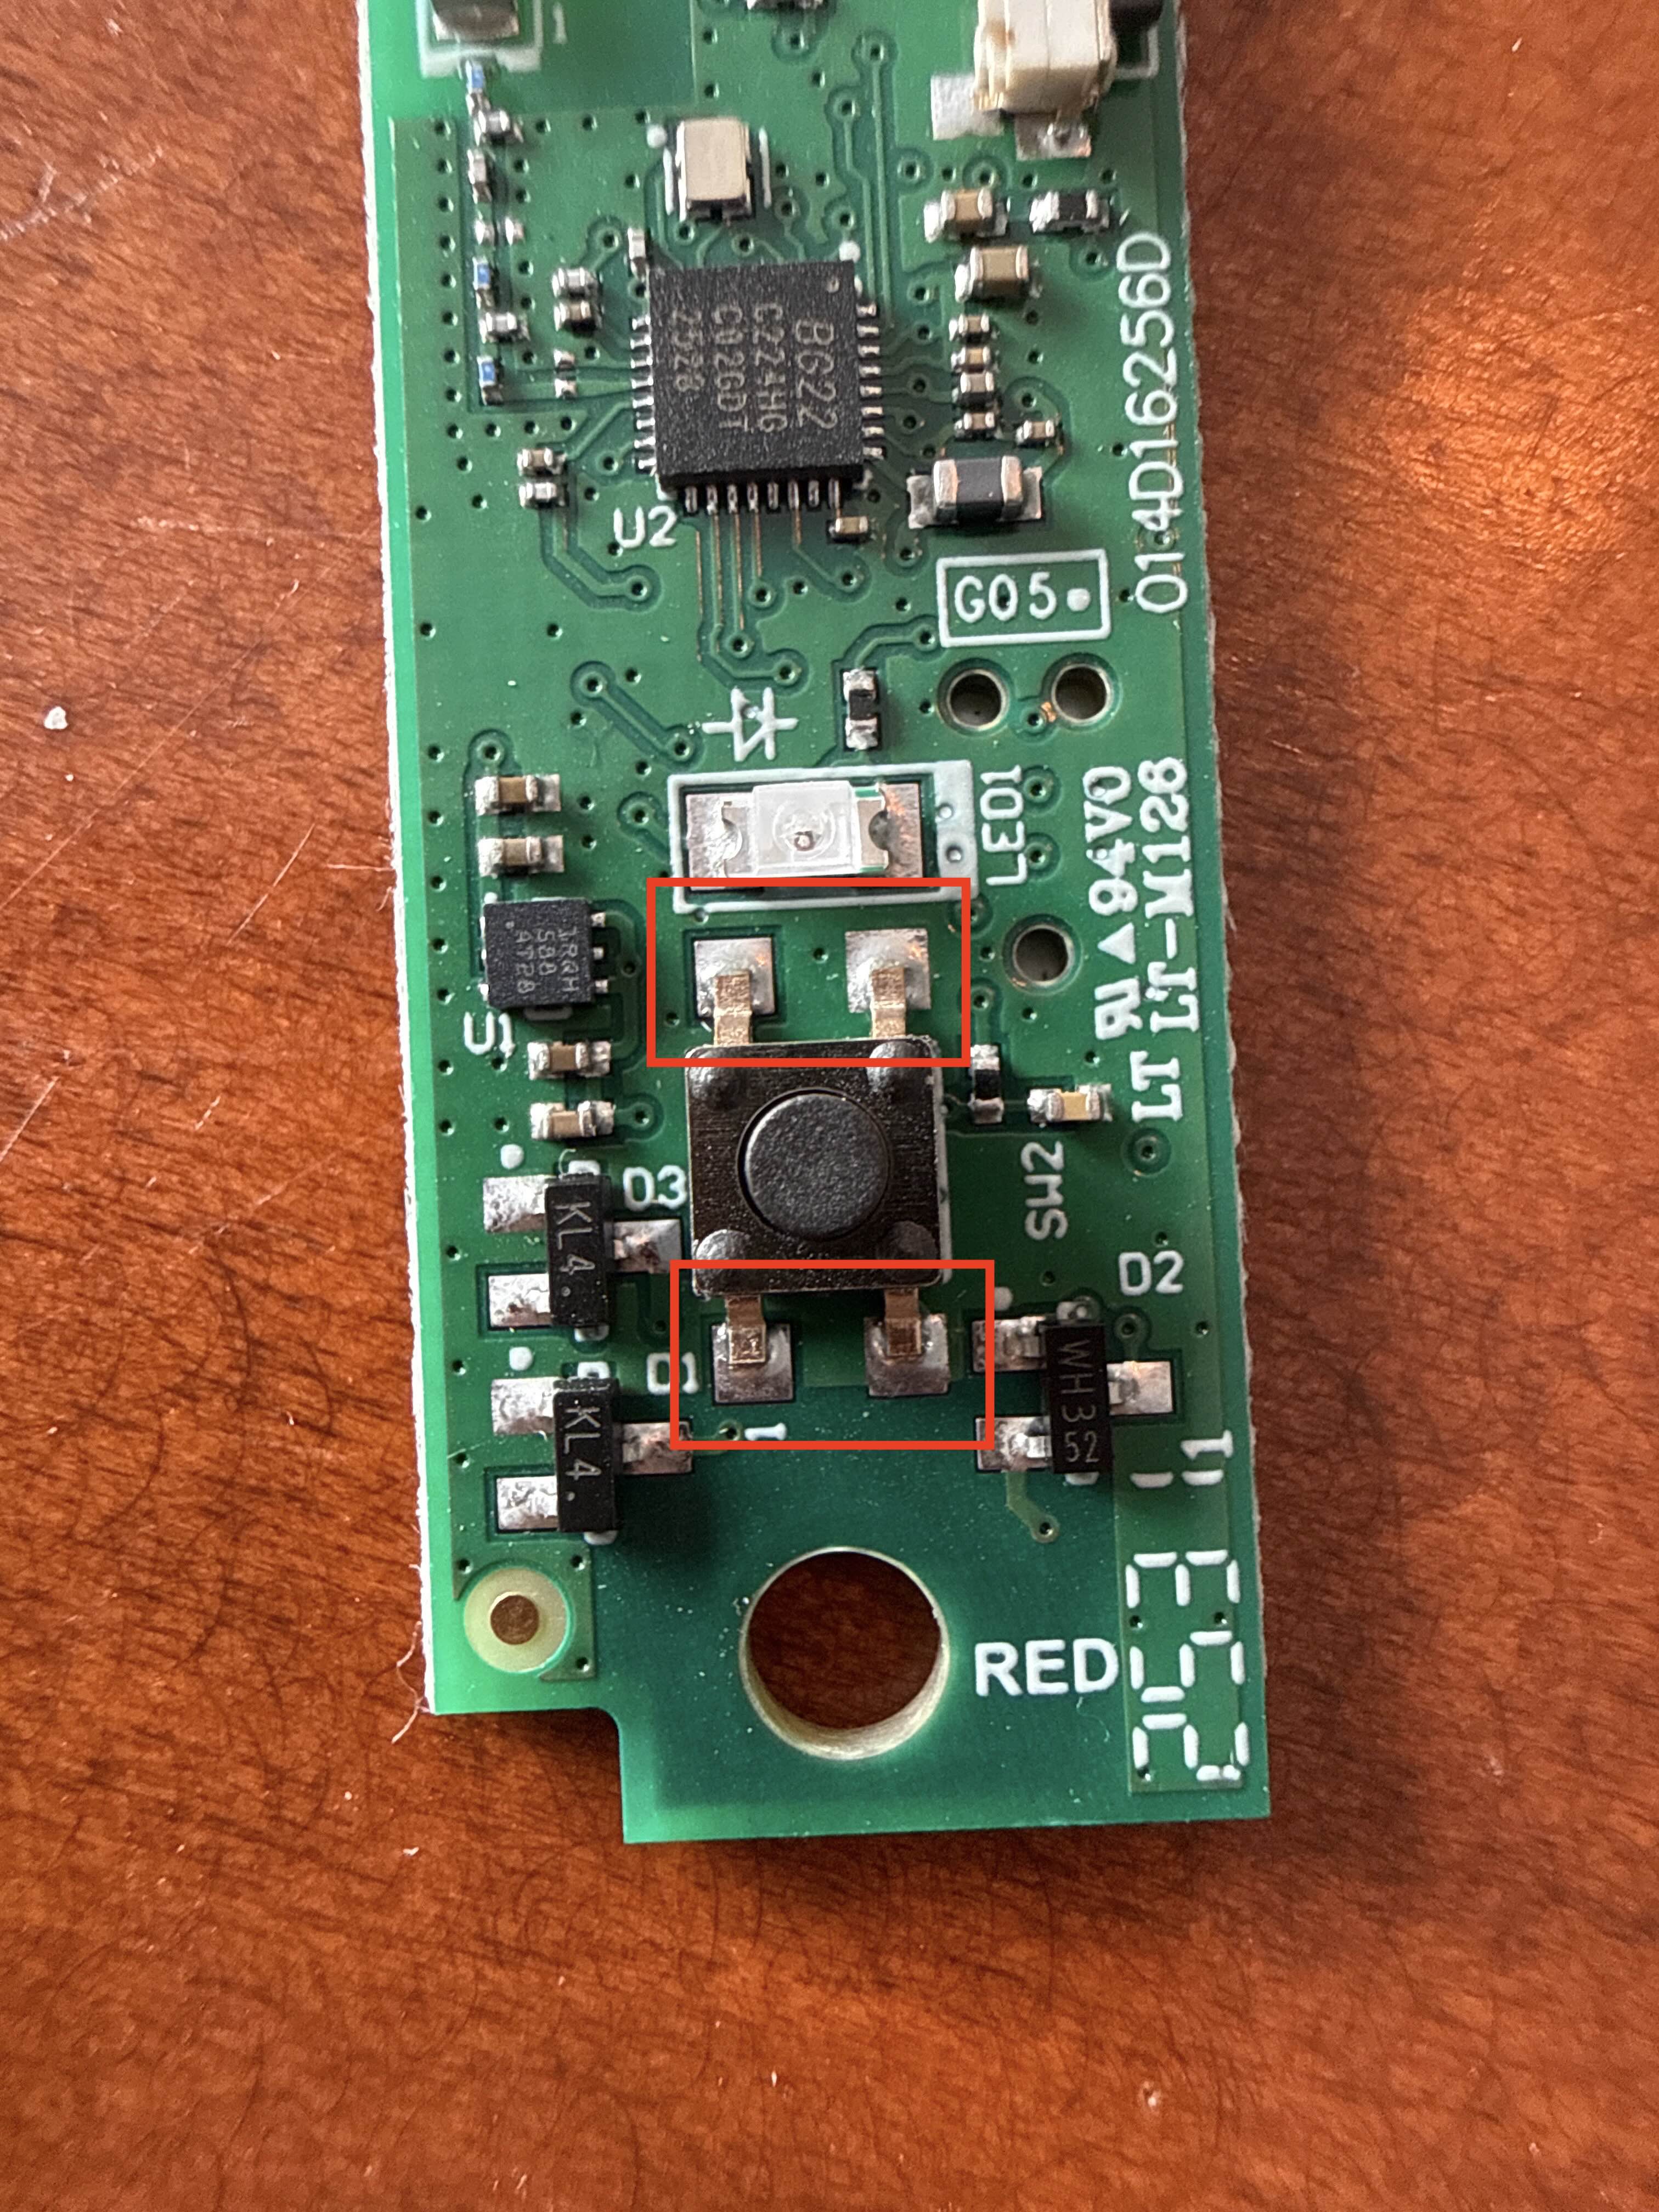
Now that I knew what pins I could short to trigger a button press I soldered wires to them:
 After that, put the button back together:
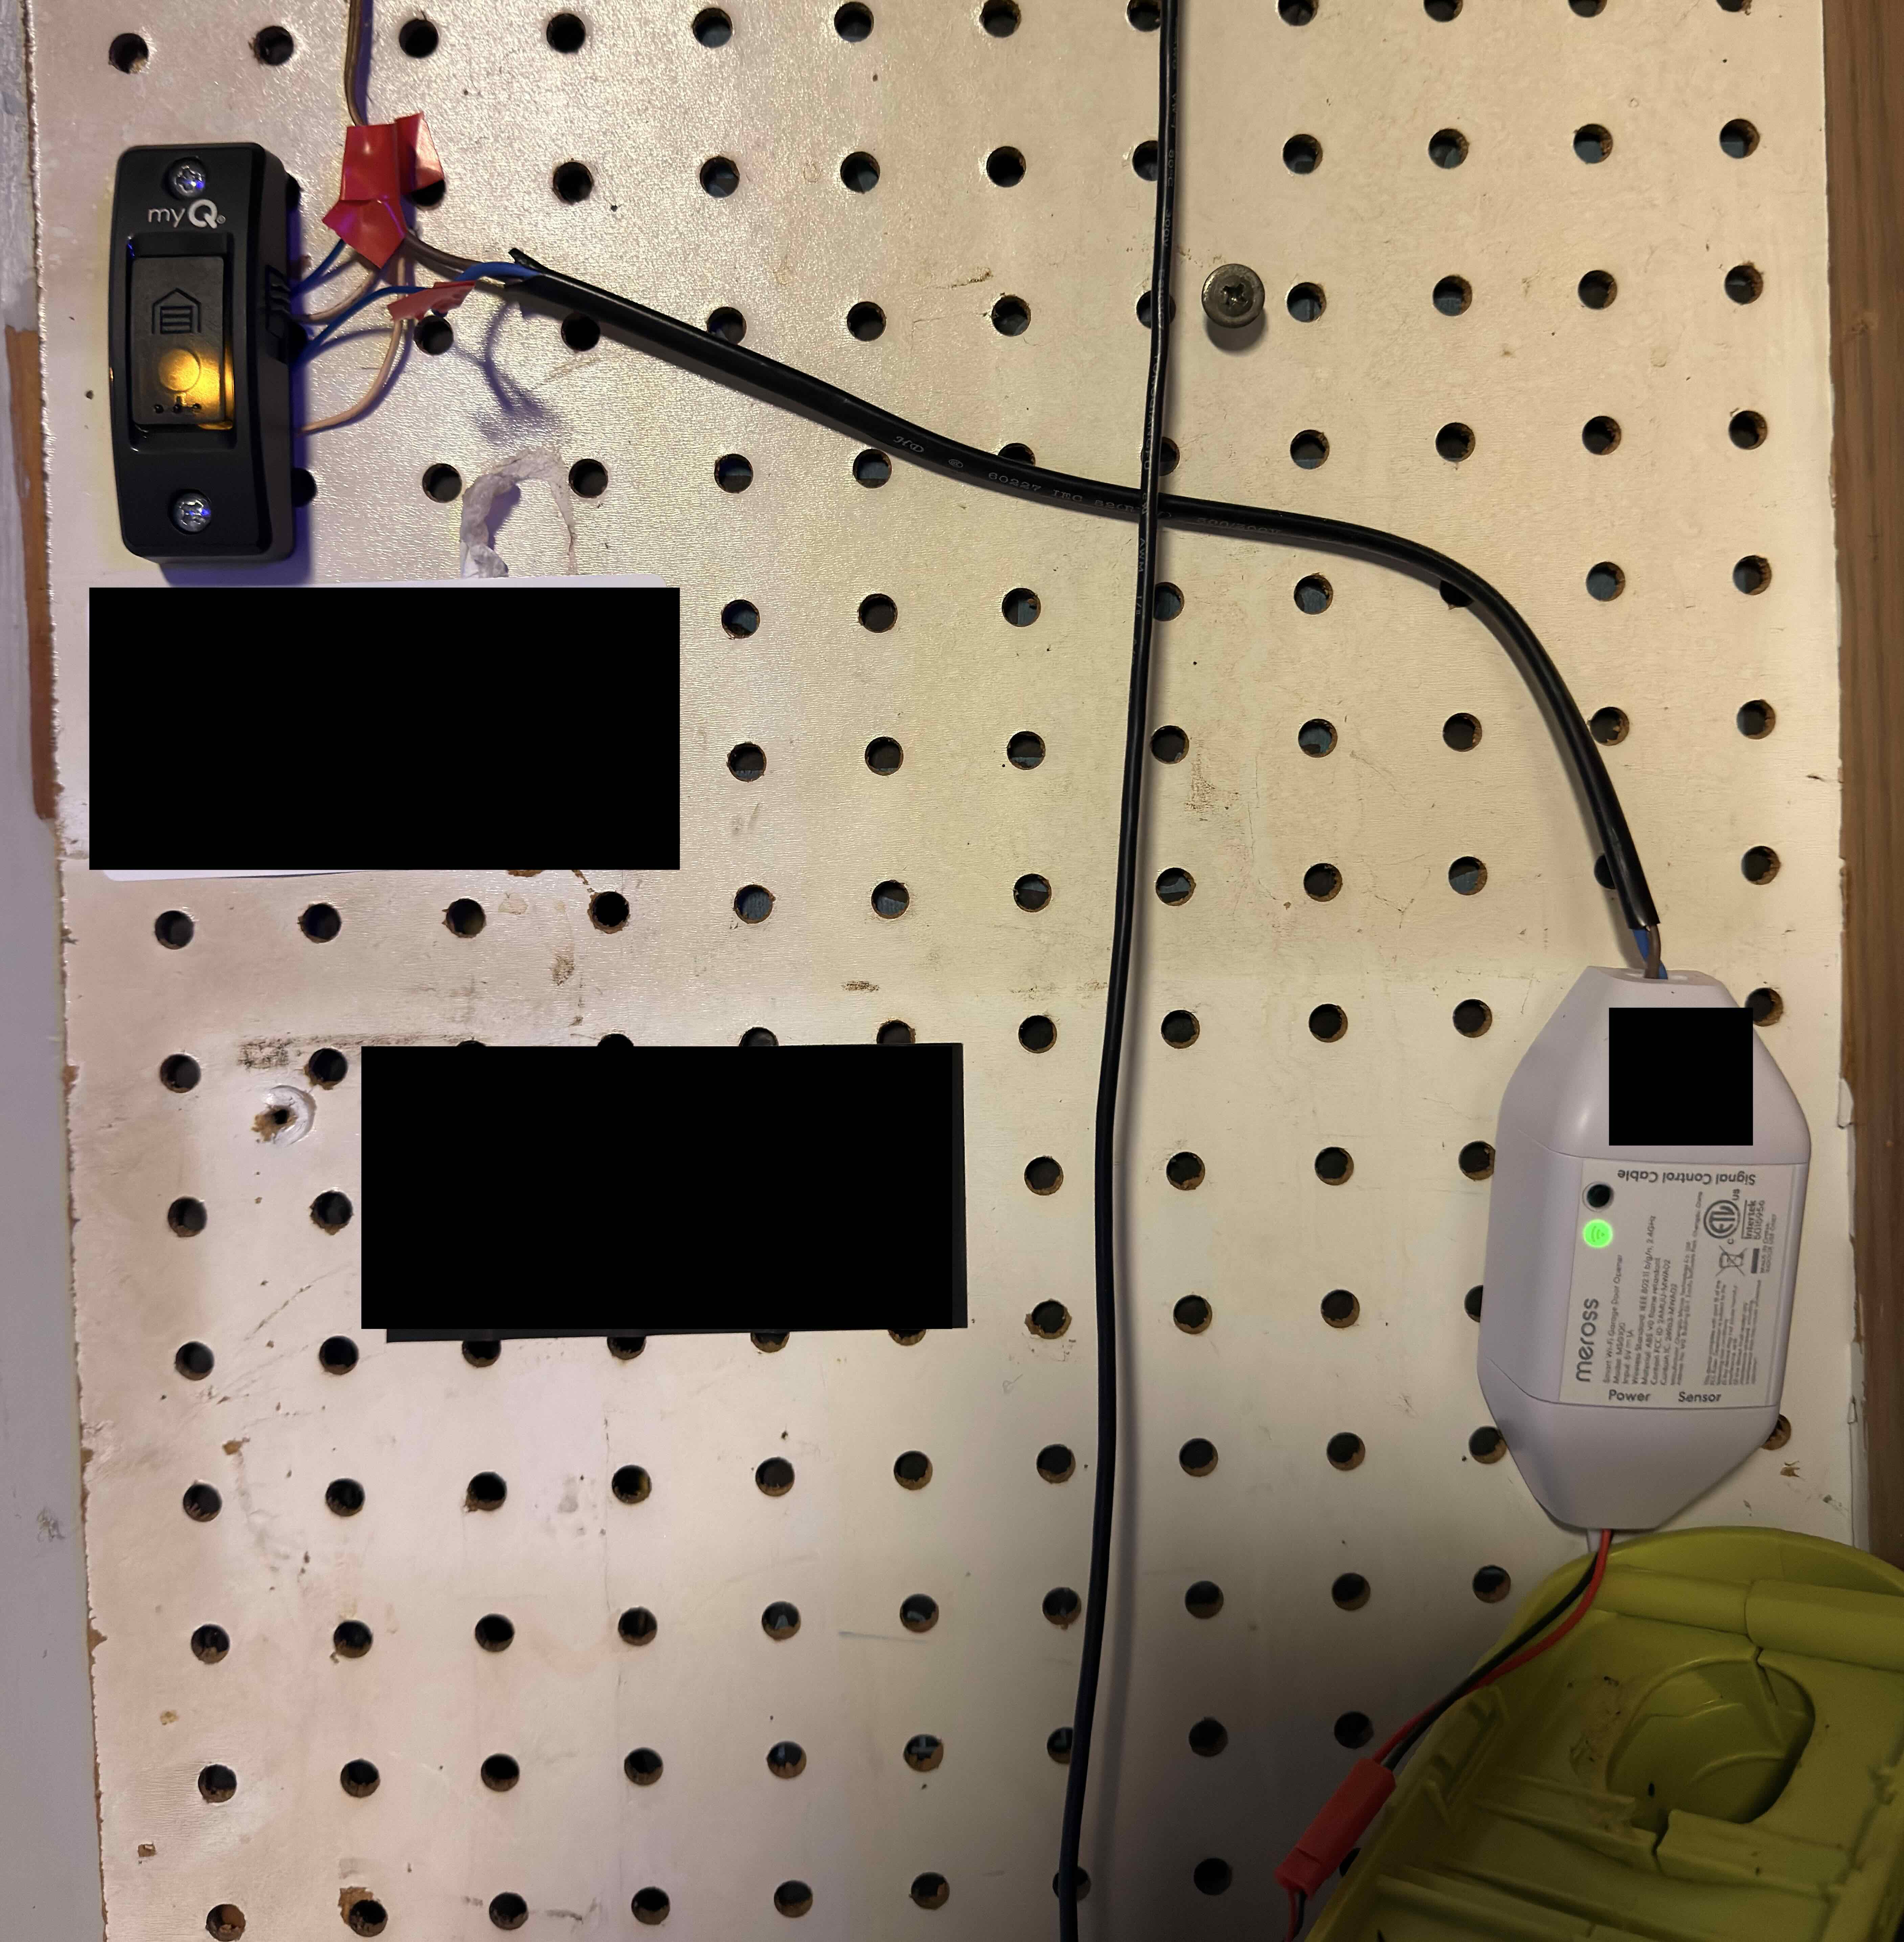
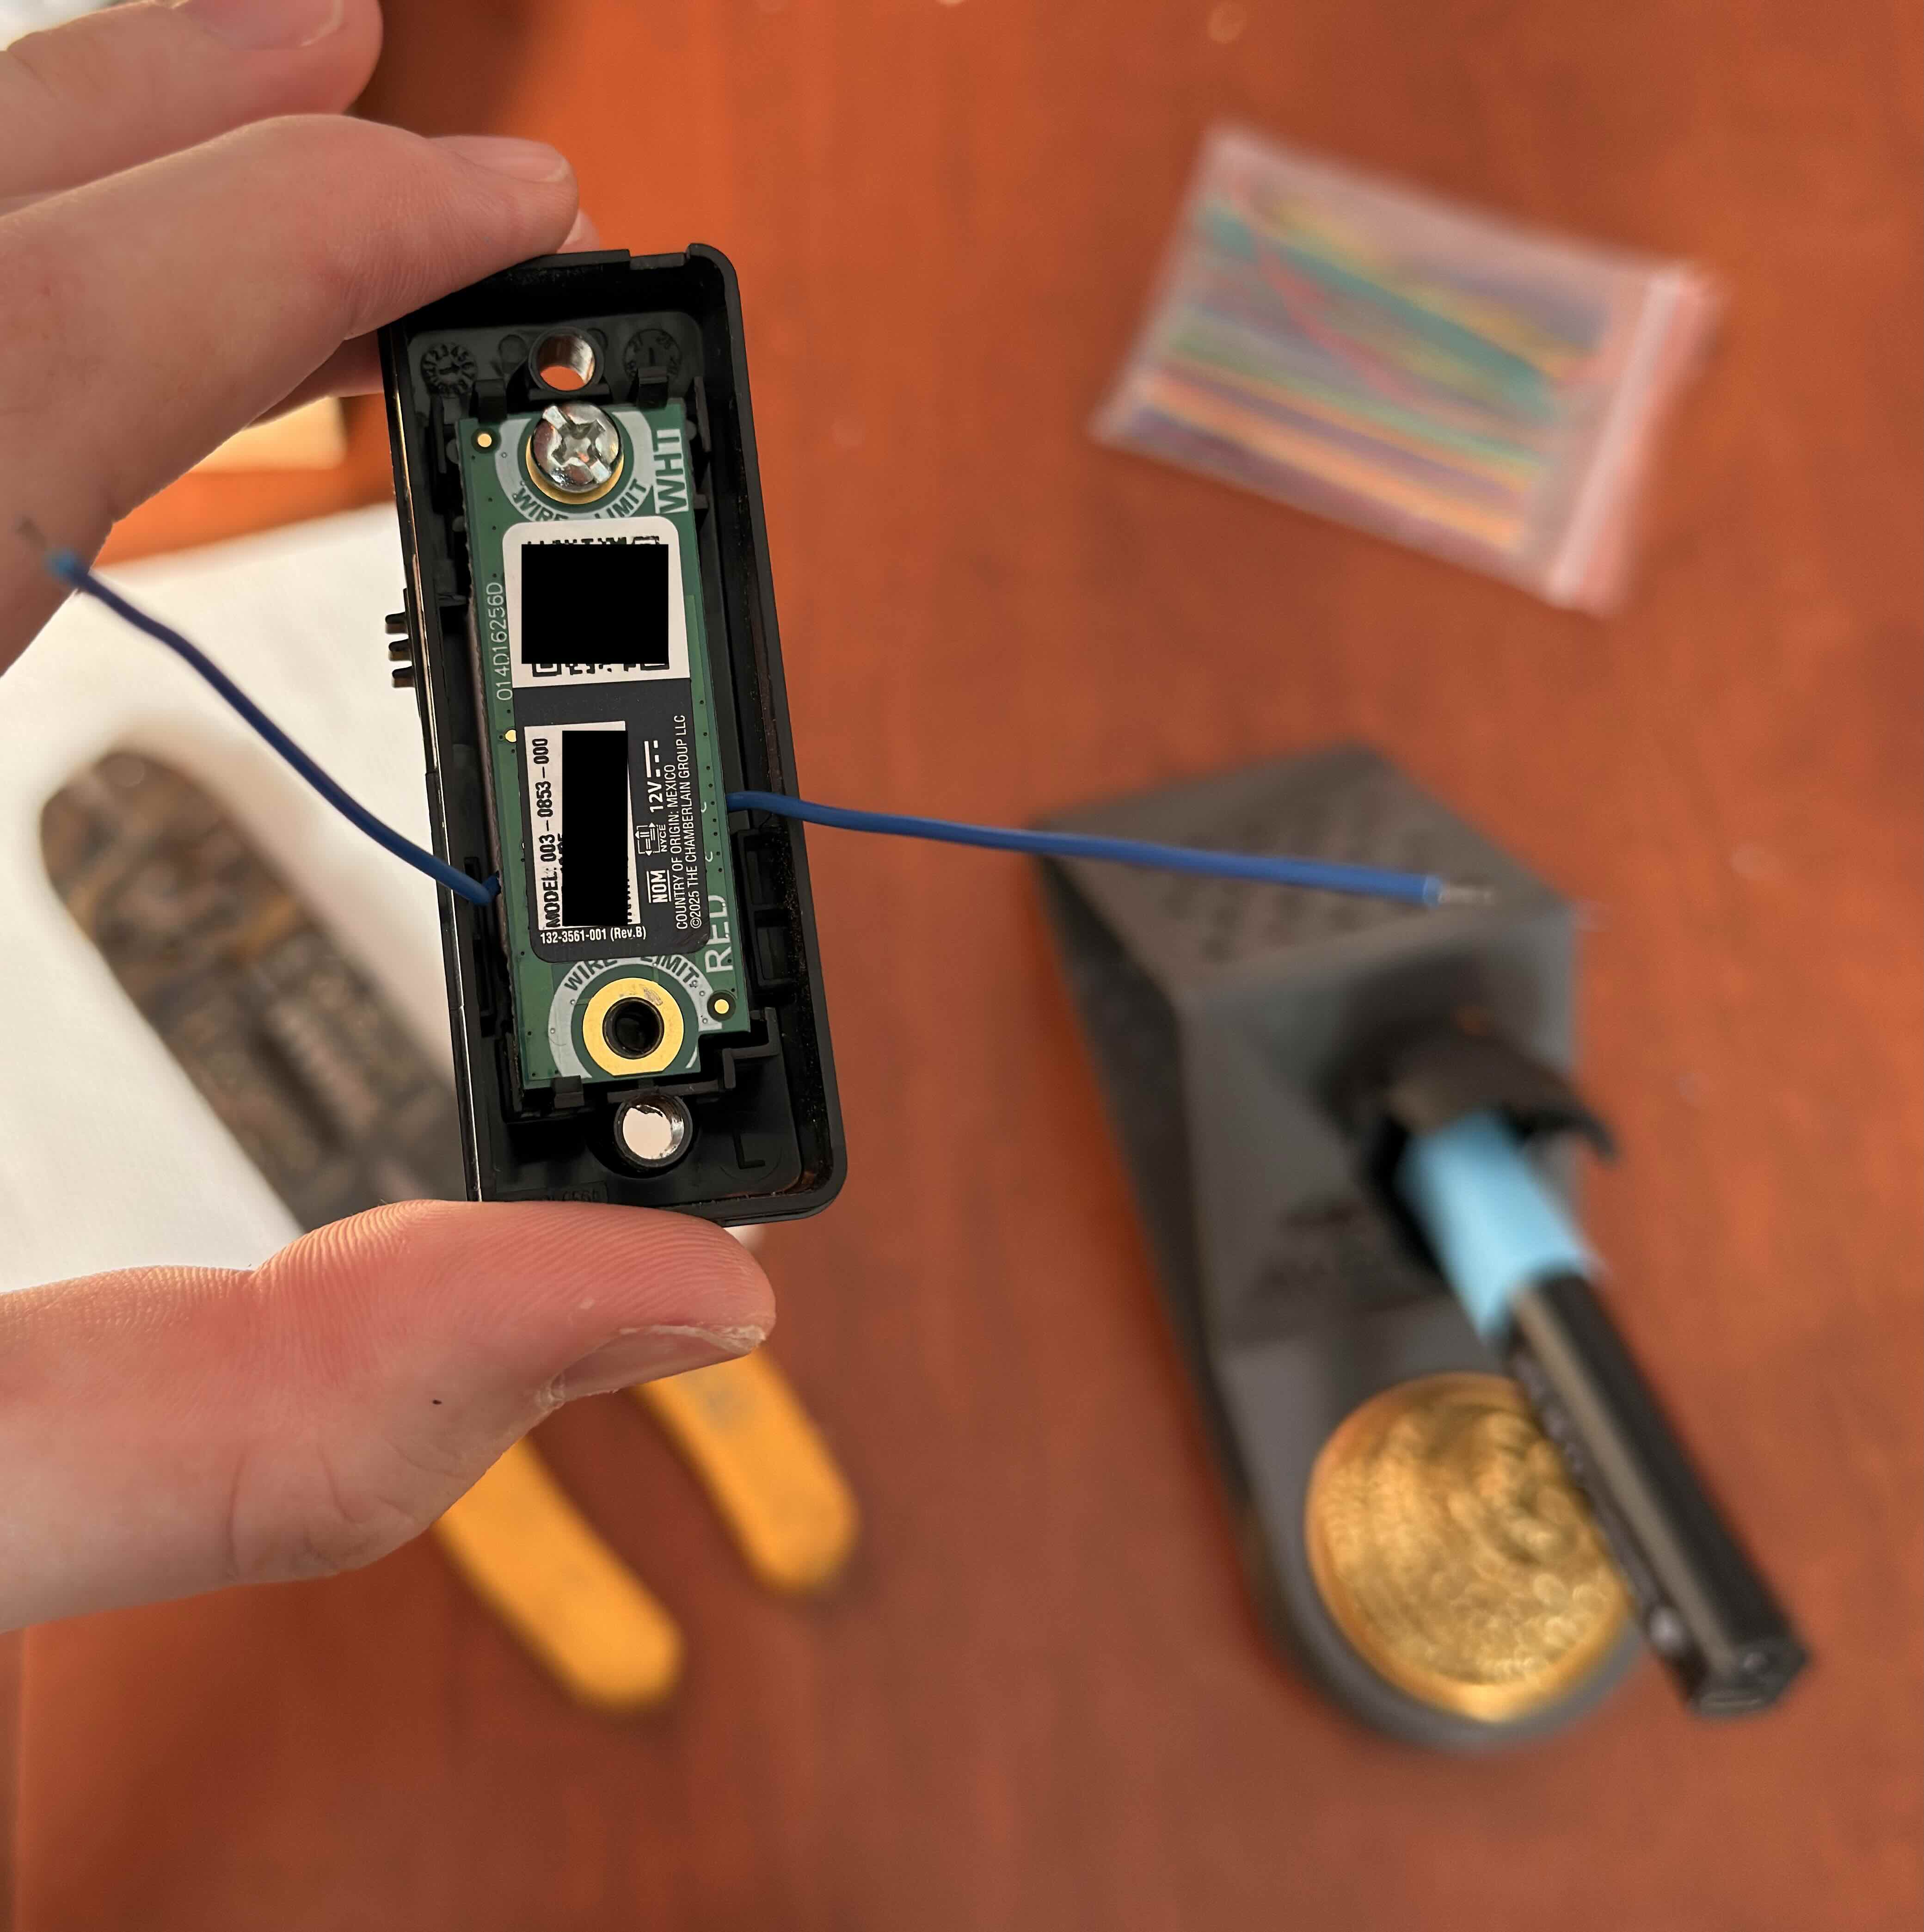 Then I connected my MSG100 Opener to the two wires and... it worked! (I'll swap the electrical tape for something more robust at some point lol)
Final Thoughts
I'm very happy with the results. This keeps my Homekit setup working exactly the same as before, without any software solutions or purchasing extra hardware.
Good try Chamberlain, can't get me on MyQ just yet! 😎